In this post we will show you in detail how can you build your own robot at cheap cost at your home alone or with a group of friends. Full explanation is given with pictures and circuit diagram wherever felt needed. The robot can be controlled by remote and moved with it. We also have a video at the end of tutorial showing its working.
This is a guest post by Debdeep Dey. He is a Electrical Engineering student studying in Supreme Knowledge Foundation Group of Institutions and is a technology freak. The robot was jointly made by him, Anik Gowswami and Sudip Banerjee. If you would like to write a guest post in this blog sharing something you made or any other topic, have a look at this page.
Okay as the heading suggests….this is a typical robot manual for the beginners. This is also my 1st robot. But the main problem I faced about building my first robot was a perfect robo-manual in the internet. After weeks of rigorous searching, I finally landed into an ebook by David R. Shircliff titled “Build a remote controlled robot”. There were a lot of chapters to read, and finally I had to isolate the few materials that I needed.So for you, I am making this short and crisp…Lets Get Started..
Objective for building this kind of robot
Mainly the idea is to build a robot which can travel in almost all types of road…be it a muddy or sandy or a slope…or a road filled with pebbles. This robot can also compete in various robotics competition held in different colleges, and can also be modified to make it a war robot, which is also an event in the robotics competition.
Budget
Truly speaking this robot will cost you around 1500 bucks…so it will be better if you can form a group of 2 or 3 …so that the total cost will be shared by the members.
Parts Needed
-
The Body: Here I have used a metal body, which is taken from an old dvd player. You can also use a piece of wood or plywood like this. Make sure that the total dimension of the robot remains 250mmX250mmX250mm. this is the default dimension in most robotic events.
 |
| remote controlled robot body |
-
Motors: You will need 4 dc geared motors for 4 wheels. Specifications: 12V, 500rpm.
 |
| remote controlled robot motors |
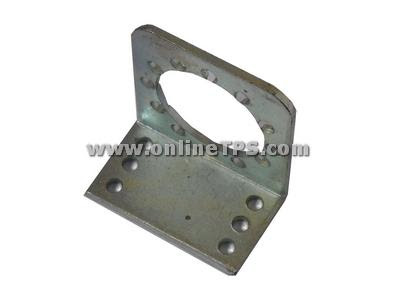
- Clamps For Motors: 4pc.
 |
| remote controlled robot clamps for motors |
- Tyres: 4pc
 |
| remote controlled robot tyres |
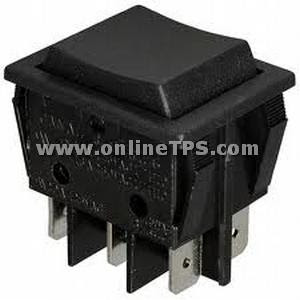
- DPDT Switch: 2pc
 |
| remote controlled robot dpdt switch |
- Wires
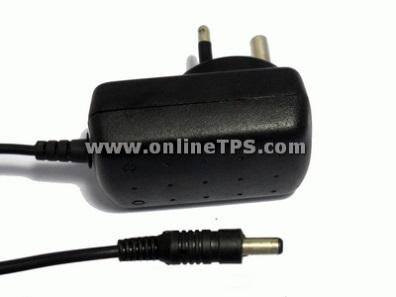
- 12V, 1A adapter/SMPS
 |
| remote controlled robot smps adapter |
You can get all these items in 1 place itself.
Address : Haque Electronics6/3 Madan Street(Ground floor), Kolkata 700072. Near Chandni Chowk Metro Station.Phn no : 9830164648. Sunday closed.Connection Diagram
 |
| remote controlled robot connection diagram |
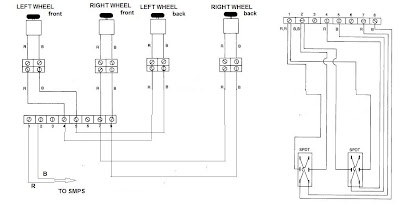
Make sure you connect the wheels in the proper places as marked in the diagram. Here R stands for red wire and B stands for black wire.
How To Assemble The Parts Of Robot
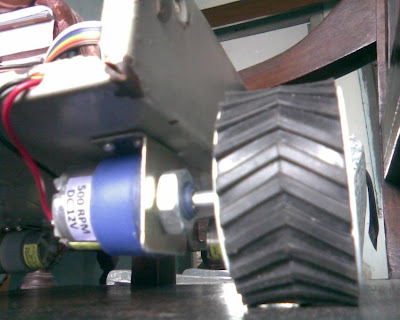
Attach the clamps to the bottom of the plywood, where you will connect the motors and the wheels.
 |
| remote controlled robot after connecting wheels |
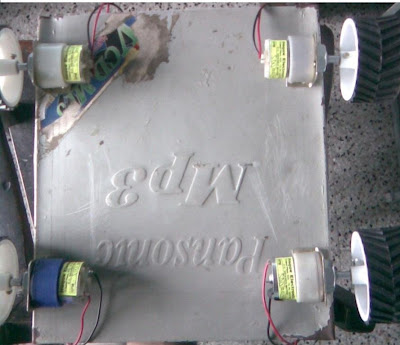
The bottom will look like this after you have completedthe connection of motors and wheels to the clamps.
 |
| remote controlled robot after connecting wheels |
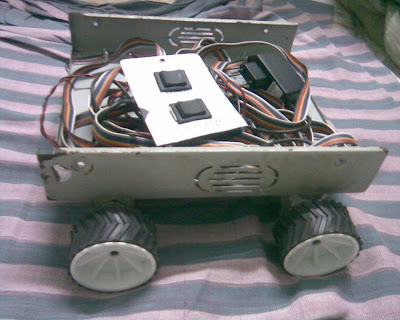
Then connect the wires to thedpdt switches and thesmps as shown in connection diagram. Finally my robot looks like this with the remote control box and thesmps.
 |
| remote controlled robot with control and SMPS |
Control
Position of DPDT Switch Function Both thedpdt switch pressedforward. Robot movesforward. Both thedpdt switch pressed backward. Robot moves backward. Only leftdpdtforward Robot turns right. Only rightdpdt forward Robot turns left. Onedpdt forward, another backward. Robot turns 360 degree.
Here the dpdt switches are mainly used for changing the polarity in the motor, so that we can move the motor forward or backward with ease. There is also a video, if you wish to check it out. It shows the robot in action, and the controls are also shown over there. One last thing ….you will need a small plastic box, so that you can use it as an remote control box where you will keep the dpdt switches.


Nice But cant find those parts here!
Glad that you liked it 🙂
Regarding the parts you can get them from some electronics shops or hardware shops. Or you may even order them online
good job!!
Hey! I want to have a robot that can walk like man and he moves from here to there. It can move its head.. I have to make this for my School’s science exhibition. It may works with it’s own digital brain or may have controlled by remote. Can you help me about how it be done!!!!! but your’s job is good..Thaks…
Well the writer says he is busy making some advanced robot that can follow a line. Once done he will push an update in this blog. So make sure you follow us for such updates 🙂
can i use the motor 12 volt which is used in tape recorder or deck ?
No…you need to use geared motors, which the tape recorders or deck dont use…It’ll be better if you buy these geared motors..
Nic one i want to make a smart robot similar to humanoid robot how can i do so
not bad,but accessories are n/a
I find quite problem in understanding the connection diagram plzz help me out in understanding it..
Please connect with the author, link is given at the beginning
What the cost u hav beared for this robo????can u pls tell….and if i want to make this wireless how it would be done??
good huh