This tutorial helps you to change the background image of GRUB, i.e. the splash image that comes behind the OS menu while booting.
In the previous tutorial, we had learned some basics of GRUB such as changing operating systems’ names, adding more OS entries etc. In this tweak, we will learn how to change the background image of the GRUB menu which shows the operating system list. I found the background image quite boring, so I did this.Note : Although the GRUB background image will be changed, after every GRUB update, it will be reverted to the original one, so you have to repeat this after every time you update it.
Step One: First of all, you need to find an image. If you don’t have it already, consider looking at gnome-look.org or a simple google search for some good ones. Please note that .gif images with animations cannot be included as GRUB background.

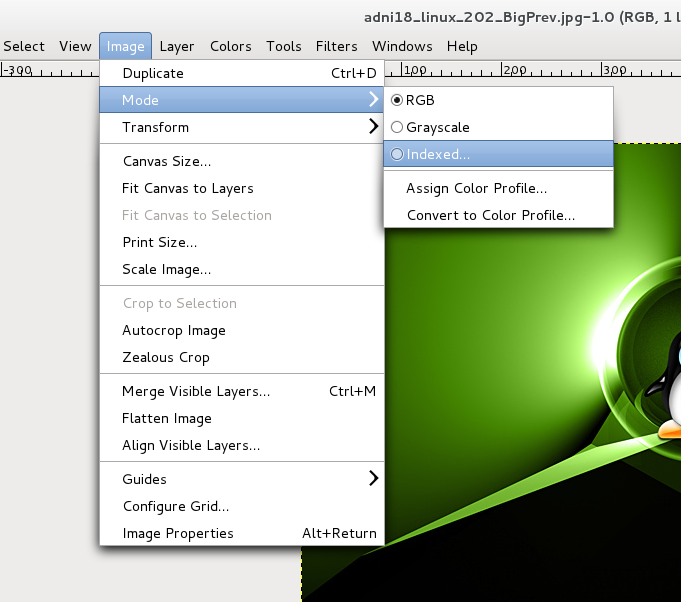
Step Two : GRUB doesn’t support images with more than 14 colors in an image. So we need to reduce the above image to 14 colors so that we can use it in GRUB. To do that, open the image with GIMP. Go to Image menu > Mode > Indexed.
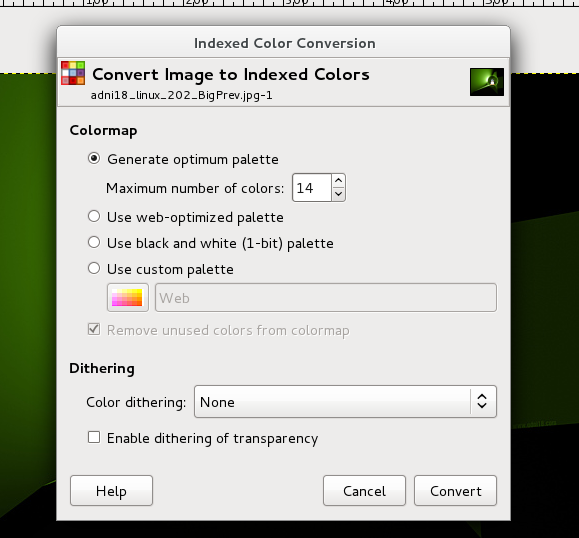
A window will come as shown below. Select “Generate Optimum Palette” and set the maximum number of colors to 14. When done, select convert.
Your image will be transformed to 14 colors. If it doesn’t looks good, you can select another image to set as your background splash image for GRUB.
Step Three : Next to scale the image, go to Image menu and select scale
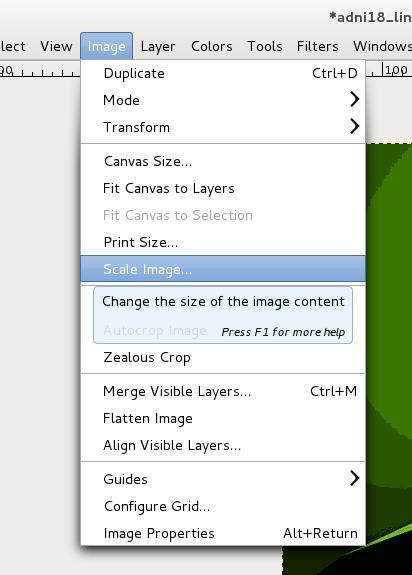
A window will come like this, set the width to 640 pixels and height to 480 pixels. Then select “Scale”. It will be changed to the provided size. Save the image and exit.

Step Four : Now we have saved the image, it it to be noted that GRUB doesn’t supports traditional .jpg or .png formats. We need to convert to to a special format called .xpm. Previous versions of GIMP supported the .xpm format, but modern ones don’t. Also note that .jpg image may not support 14 colors so you may need to convert it to .png first.
Go to the site http://www.convertmyimage.com which is an online image converter site that supports many formats, including .xpm. Upload that image and convert it to .xpm. When done, download it and save it in your PC.
S
tep Five : Now there is one more step. We need to zip the image for making it usable in GRUB. Use the following command to do so:
$ gzip image.xpm
$ sudo cp /boot/grub/splash.xpm.gz ~
$ sudo mv splash.xpm.gz /boot/grub/
GRUB image will be changed as shown below.


1 comment